In Unity's Universal Render Pipeline (URP), the Scriptable Render Feature (and Scriptable Render Pass) is a powerful mechanism for adding custom post-processing effects (such as pixelation, chromatic aberration, or scanlines), outline renders for specific characters, or rendering certain objects on top of everything else.
However, many developers face frustrating issues when setting up custom Render Features: effects not appearing on screen, transparent objects (like particles) sorting incorrectly, overlays drawing on top of UI elements, or screen blackouts (Black Screen) after upgrading to Unity 2022.3 or Unity 6 because cmd.Blit no longer works.
This article explains the root cause of these rendering ordering and missing effect bugs through URP's execution pipeline and RenderPassEvent timings, and provides a modern implementation template using RTHandle and Blitter.BlitCameraTexture compatible with Unity 2022.3 and Unity 6.
1. The Root Cause: RenderPassEvent Mismatches and Buffer Lifecycles
The most common cause of custom rendering failing or sorting incorrectly is an improperly configured RenderPassEvent (Injection Point). URP executes its rendering steps in a strict sequence (Opaque, Depth Prepass, Transparents, Post-Processing, etc.), as illustrated below:
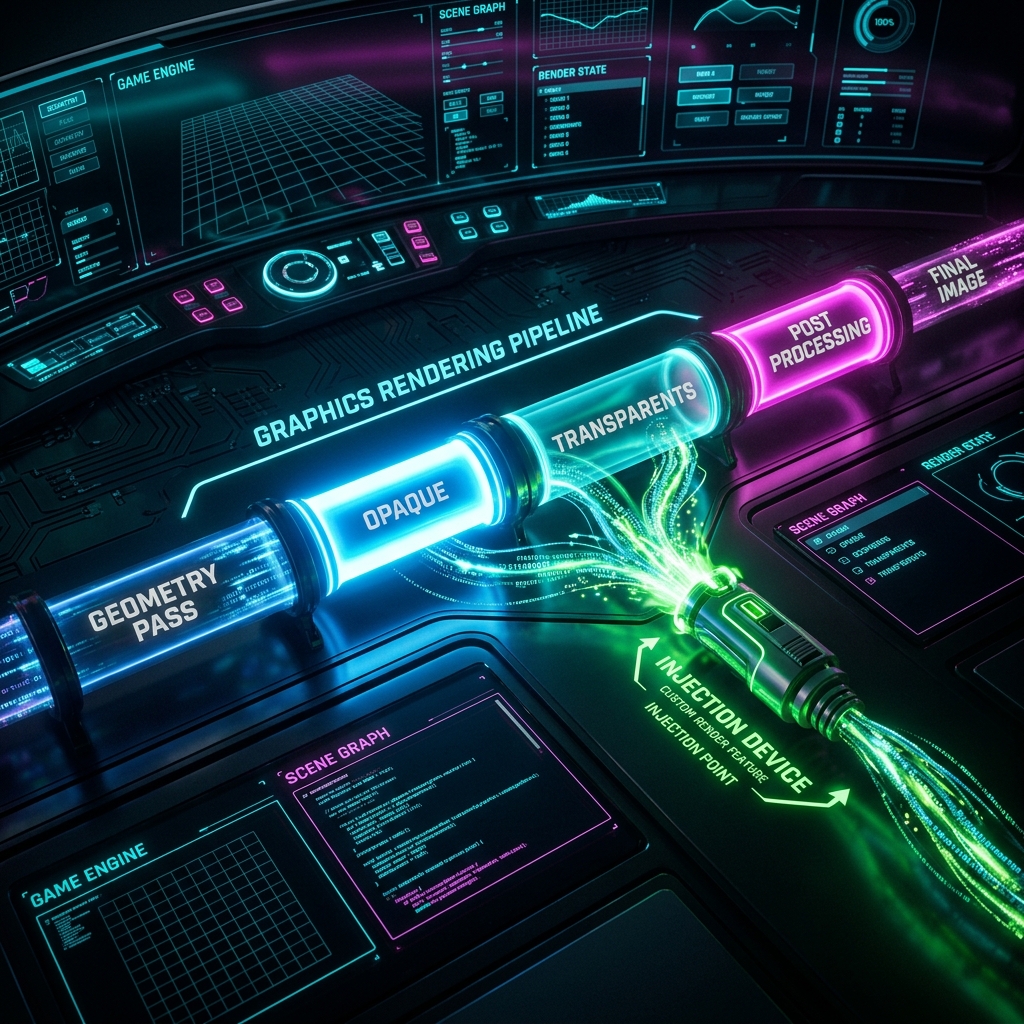
Figure: URP Render Pipeline Flow and Custom Render Pass Injection Points
Typically, issues arise from three scenarios:
- Reading Uninitialized Buffers: Injecting full-screen effects during events like
BeforeRenderingOpaquesbefore the camera's color or depth buffers are cleared and rendered results in a black screen or trails from previous frames. - Post-Processing Conflicts: URP's default post-processing (Bloom, Color Adjustments, etc.) is processed between
BeforeRenderingPostProcessingandAfterRenderingPostProcessing. If you inject a custom post-effect afterAfterRenderingPostProcessing, it runs after URP color grading is finished and writes directly to the backbuffer, bypassing color-correction or drawing on top of Screen Space - Overlay UI canvases. - Transparency Sorting Mismatches: Transparent objects (water, smoke, glass) are rendered after opaque objects are completed. If you execute a custom outline or masking pass during
AfterRenderingOpaques, it draws correctly relative to opaques, but subsequent transparent rendering will draw on top of your outline, making it vanish or sort incorrectly.
2. RenderPassEvent Selection Matrix
Choose the correct RenderPassEvent based on your desired rendering behavior:
| RenderPassEvent | Primary Use Cases / Suitable Rendering | Available Buffers & Characteristics |
|---|---|---|
| BeforeRenderingOpaques | Custom depth pre-passes, custom screen-space decals. | Color buffer is cleared. 3D objects are not yet rendered. |
| AfterRenderingOpaques | Silhouettes (X-ray wall vision), character outline rendering. | Opaque geometry is fully rendered. Transparent objects are unrendered. |
| AfterRenderingTransparents | Water refraction, fog modifications, pre-post-processing overlays. | Entire 3D scene (opaques and transparents) is fully rendered. |
| BeforeRenderingPostProcessing | Custom post-processing (DOF, blurs, screen distortion, etc.). | Just before default URP post-processing (Bloom, Color Grading) applies. |
| AfterRenderingPostProcessing | Final screen adjustments (dithering, scanlines, pixelation) before UI. | All 3D passes and post-processing are complete. Runs right before Overlay UI. |
3. Solution: Modern Scriptable Render Feature Template for Unity 2022.3 / Unity 6
Legacy APIs like cmd.Blit(source, destination) and GetTemporaryRT are **deprecated** in newer Unity versions because they conflict with dynamic resolution scaling (Render Scale) and VR multi-pass rendering. Use the modern RTHandle and Blitter.BlitCameraTexture classes to ensure zero-allocation runtime performance.
Example: Custom Color Inversion Post-Effect
using UnityEngine;
using UnityEngine.Rendering;
using UnityEngine.Rendering.Universal;

public class ColorInvertRenderFeature : ScriptableRenderFeature
{
    [System.Serializable]
    public class Settings
    {
        public Material invertMaterial;
        public RenderPassEvent renderEvent = RenderPassEvent.BeforeRenderingPostProcessing;
    }

    [SerializeField] private Settings settings = new Settings();
    private ColorInvertPass invertPass;

    public override void Create()
    {
        invertPass = new ColorInvertPass(settings.invertMaterial);
        invertPass.renderPassEvent = settings.renderEvent;
    }

    public override void AddRenderPasses(ScriptableRenderer renderer, ref RenderingData renderingData)
    {
        if (settings.invertMaterial == null) return;

        // Pass camera target color handle to the pass
        invertPass.Setup(renderer.cameraColorTargetHandle);
        renderer.EnqueuePass(invertPass);
    }

    protected override void Dispose(bool disposing)
    {
        invertPass?.Dispose();
    }
}

public class ColorInvertPass : ScriptableRenderPass
{
    private Material material;
    private RTHandle cameraColorTarget;
    private RTHandle tempTexture; // RTHandle for the temporary buffer

    public ColorInvertPass(Material material)
    {
        this.material = material;
    }

    public void Setup(RTHandle colorTarget)
    {
        this.cameraColorTarget = colorTarget;
    }

    public override void OnCameraSetup(CommandBuffer cmd, ref RenderingData renderingData)
    {
        // Get camera rendering parameters (resolution, format, etc.)
        var desc = renderingData.cameraData.cameraTargetDescriptor;
        desc.depthBufferBits = 0; // We only need color, no depth buffer needed for post effect

        // Reallocate temporary texture safely (automatically scales with Render Scale)
        RenderingUtils.ReAllocateIfNeeded(ref tempTexture, desc, FilterMode.Bilinear, TextureWrapMode.Clamp, name: "_TempColorInvertTexture");
    }

    public override void Execute(ScriptableRenderContext context, ref RenderingData renderingData)
    {
        if (material == null || cameraColorTarget == null) return;

        // Fetch command buffer from Pool
        CommandBuffer cmd = CommandBufferPool.Get("ColorInvertPass");

        using (new ProfilingScope(cmd, new ProfilingSampler("Color Invert Execution")))
        {
            // 1. Copy the camera color texture into the temporary buffer
            Blitter.BlitCameraTexture(cmd, cameraColorTarget, tempTexture);

            // 2. Render from temporary texture back into camera target using custom material
            // Note: The shader must sample from "_BlitTexture"
            Blitter.BlitCameraTexture(cmd, tempTexture, cameraColorTarget, material, 0);
        }

        // Execute and release buffer
        context.ExecuteCommandBuffer(cmd);
        CommandBufferPool.Release(cmd);
    }

    public override void OnCameraCleanup(CommandBuffer cmd)
    {
        // Do not release RTHandles here (rely on Dispose for persistent allocations)
    }

    public void Dispose()
    {
        // Prevent memory leaks by explicitly releasing RTHandle resources
        tempTexture?.Release();
    }
}
Corresponding HLSL Shader (URP Blit Shader)
The texture passed by the Blitter must be sampled as _BlitTexture inside the HLSL block. Below is the minimum shader code to invert colors:
Shader "Hidden/URPInvertBlit"
{
    SubShader
    {
        Tags { "RenderType"="Opaque" "RenderPipeline" = "UniversalPipeline"}
        LOD 100
        ZWrite Off ZTest Always Cull Off

        Pass
        {
            Name "InvertColorPass"

            HLSLPROGRAM
            #pragma vertex Vert
            #pragma fragment Frag

            // Standard URP Blit HLSL Includes
            #include "Packages/com.unity.render-pipelines.universal/ShaderLibrary/Core.hlsl"
            #include "Packages/com.unity.render-pipelines.core/Runtime/Utilities/Blit.hlsl"

            half4 Frag(Varyings input) : SV_Target
            {
                UNITY_SETUP_STEREO_EYE_INDEX_POST_VERTEX(input);

                // Sample pixel color from _BlitTexture using screen-space UV coordinates
                float2 uv = input.texcoord;
                half4 color = SAMPLE_TEXTURE2D_X(_BlitTexture, sampler_LinearClamp, uv);

                // Invert RGB channels
                return half4(1.0 - color.rgb, color.a);
            }
            ENDHLSL
        }
    }
}
4. Bad Practices and How to Avoid Them
Ensure your custom Scriptable Render Features do not commit these common mistakes:
1. Allocating RTHandles or Instantiating Command Buffers inside Execute()
Instantiating objects or re-allocating textures inside Execute() triggers excessive GC Allocations every frame, leading to periodic framerate stutter (GC spikes).
Solution: Fetch command buffers using CommandBufferPool.Get() and handle texture allocation in OnCameraSetup using RenderingUtils.ReAllocateIfNeeded. Always clean up persistent RTHandles in your feature's Dispose() callback.
2. Direct Blitting: cmd.Blit(cameraColorTarget, cameraColorTarget, material)
Reading from and writing to the exact same render texture simultaneously causes undefined GPU behaviors. This leads to screen flickering, corrupted textures, or total blackouts.
Solution: Always allocate a temporary buffer (Ping-pong setup). Blit from the source to the temp buffer, then blit from the temp buffer back to the target with your material.
3. Render Features Drawing Over Transparents / Particle Effects
If you disable depth testing (ZTest Always) in your custom shader, objects drawn by your Render Feature will bypass occlusion, drawing on top of foreground particles and geometry.
Solution: Ensure your custom material uses ZTest LEqual (or ZTest Keep) to respect depth buffer constraints, or schedule the pass to execute after transparents (AfterRenderingTransparents) if sorting rules require it.
By understanding URP pipeline schedules and injection events, you can build performant, stable custom effects and rendering modifications that scale across platforms.